
Sunprints

Sunprints I made in the summer at the family cottage
Wednesday, 14 March 2018
Fibre Fling 7
This year I'm participating in Fibre Fling again with Out-of-the Box. The dates are April 6 and 7th. It will be held in the same place, Kitchissippi United Church. Below is the flyer with all the details. I will be selling my hand printed fabrics and this year I'll also sell some hand dyed fat quarters that I snow dyed! I'll have my eco print greeting cards there as well. I'm still working out whether I'll submit any pieces to the show. I hope to see some of you there!
Wednesday, 7 February 2018
Snow dyeing vs dyeing in a jar
So I thought I would try comparing the results snow dyeing a quarter yard of white cotton fabric and taking the same sized piece of fabric and scrunching it into a small mason jar and pouring over liquid dyes. I used the same colours and amounts of dye for each. I used navy blue, scarlet and turquoise. Here is the snow dyed piece below.
 And here is my jar dyed piece below.

I like both of them although they're definitely different. So what did I conclude from this? Even if I don't have snow I can get some interesting results.


I like both of them although they're definitely different. So what did I conclude from this? Even if I don't have snow I can get some interesting results.
Wednesday, 24 January 2018
Snow dyeing step by step
I wanted to take what I learned from Pat Hardie a few weeks ago and do a smaller version of it. So yesterday I snow dyed some smaller piece of white cotton a little larger than a quarter yard. Here are the two pieces of fabric presoaked in soda ash solution, wrung out, scrunched up and put in some produce containers.

Here they are with about an inch of snow put on top of each.

Here are the dye solutions ready to spoon onto the snow. They are Procion Mx dyes carefully mixed with water. The colours don't look the way they finish up. I have black here, scarlet, grass green and golden yellow.

Next I dribbled the dyes onto the snow with the spoons. I used black, golden yellow and scarlet in the top one and black, golden yellow and grass green in the second. I covered the containers and put them into the garage overnight.

The next morning they looked like this.

I put them inside because they needed to finish melting. I rinsed and washed the fabrics. I hung them to dry and ironed them. Here are the results! I'm happy with them. They do look a little different than the fabric I dyed a few weeks ago. I'm grateful to Pat for showing me this fun technique. A great winter activity while I wait for spring to come. Thanks for stopping by.


Monday, 22 January 2018
Snow dyeing
A few weeks ago I went to my friend's house and she showed me how to do snow dyeing. The snow was kind of melting so it was quite granular. I'm very pleased with the results. Here are some of the photos of my dyed one metre pieces. I've laid two fabrics side by side below.

The dye is poured onto a layer of snow on top of a piece of fabric and as it melts the colours create colour and patterns on the fabric.


For the orange fabric below I only used two colours but for the rest I used three. Three seems to be the magic number before you start creating muddy combinations. Although muddy might be fun. Today I'm using some of my leftover dyes to snow dye much smaller pieces of fabric. Step by step photos and results to follow tomorrow.


The dye is poured onto a layer of snow on top of a piece of fabric and as it melts the colours create colour and patterns on the fabric.

Here's a closer photo of the pink fabric above.

For the orange fabric below I only used two colours but for the rest I used three. Three seems to be the magic number before you start creating muddy combinations. Although muddy might be fun. Today I'm using some of my leftover dyes to snow dye much smaller pieces of fabric. Step by step photos and results to follow tomorrow.

Thursday, 7 December 2017
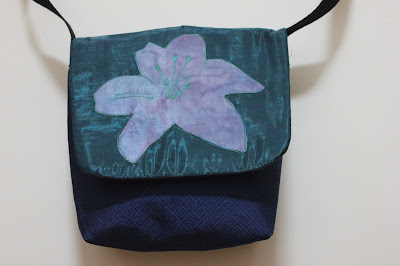
New purse
I finally finished making a new purse for myself. I'm kind of fussy so sometimes it takes me a while. I had a few prototypes going. The body is made of brocade and the flap has an appliqued flower on it with sheer fabric over it. It's large enough to carry all my things. And of course it's dark blue since I love blue. Here's the result:

Thursday, 23 November 2017
Christmas card making
Recently I've been making my Christmas cards for this year. Here are some photos of the progression of printing I did.
Here are the trees that printed using a fern leaf below. I printed on white fabric. The top fabric strip is the first step. I painted a sky. The bottom strip is the same fabric with the ferns printed on them to look like Christmas trees.

Then I painted on some silver paint and added some Christmas balls below.

Next I cut out the individual trees and put them on my cards. It's too bad I had to cut them out in a way because they looked kind of good in a line. So now I'll sign them and send them out soon. Talk to you soon.

Friday, 3 November 2017
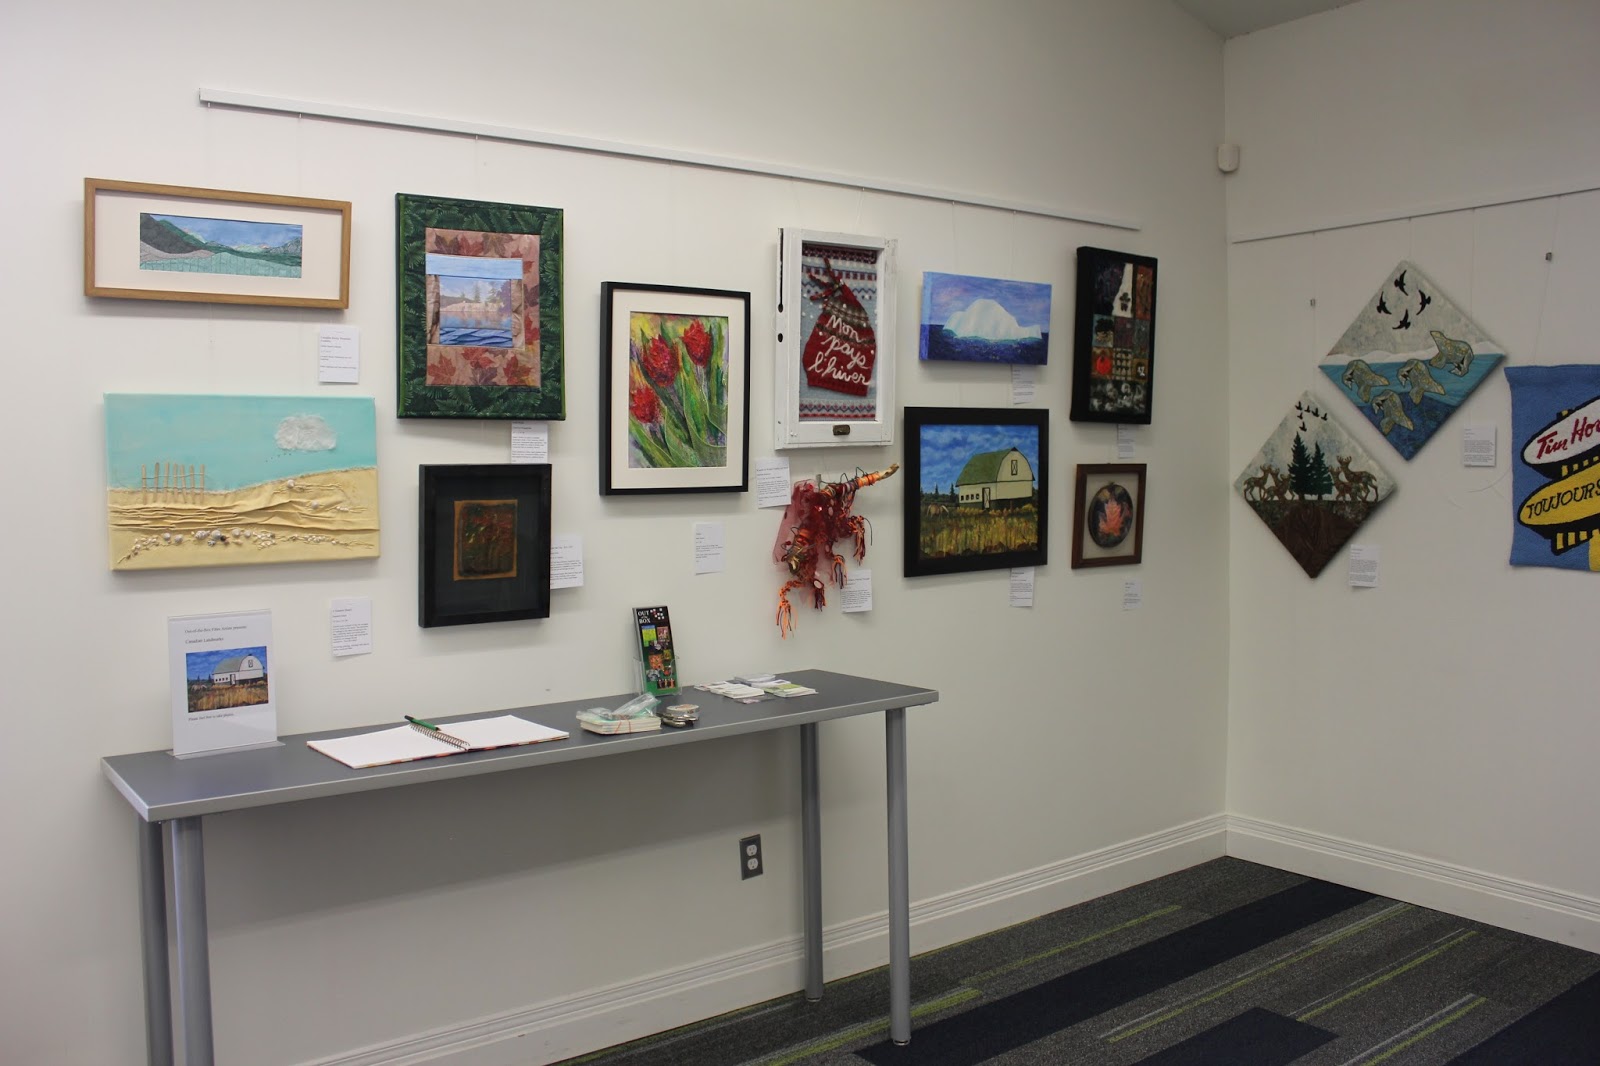
Sttitsville Library Exhibit - Canadian Landmarks
I've been busy the last while organizing the Stittsville library exhibit that we have had every year for several years with Out-of-the-Box. I was the organizer this year. The theme this year was Canadian Landmarks. This could be interpreted fairly loosely as a place, an event in Canadian history, something recognizably Canadian etc. We had quite a few pieces submitted which was great. We hung up the show on November 1st. It will be at the Stittsville Library for the month of November so if you're in town, please go and have a look. Here are a few photos. And there are prices on the artwork for many of them.

The Tim Hortons piece is a rug hooking done by hand. A lot of work!

There's a glass display case with three dimensional objects too. This is a doll representing the lady who sewed the first Canadian flag in 1964.


Do go and have a look at the show if you can. Thanks for having a look.
The Tim Hortons piece is a rug hooking done by hand. A lot of work!

There's a glass display case with three dimensional objects too. This is a doll representing the lady who sewed the first Canadian flag in 1964.

This one is called Ode to Newfoundland. Juanita Sauve created this one and she wrote a song Ode to Newfoundland which is on the back of the piece.

Do go and have a look at the show if you can. Thanks for having a look.
Subscribe to:
Posts (Atom)